住所からジオコードを取得
クライアントサイドはGeocoding API使えそう。 https://developers.google.com/maps/documentation/javascript/geocoding
ライブラリ。TypeScript対応。Geocoding API対応。 https://www.npmjs.com/package/@googlemaps/google-maps-services-js TypeScript対応。Geocoding API対応。
API有効化。restrictionに設定。
403エラー。
{
   "error_message" : "API keys with referer restrictions cannot be used with this API.",
   "results" : [],
   "status" : "REQUEST_DENIED"
}

これで取得できた。
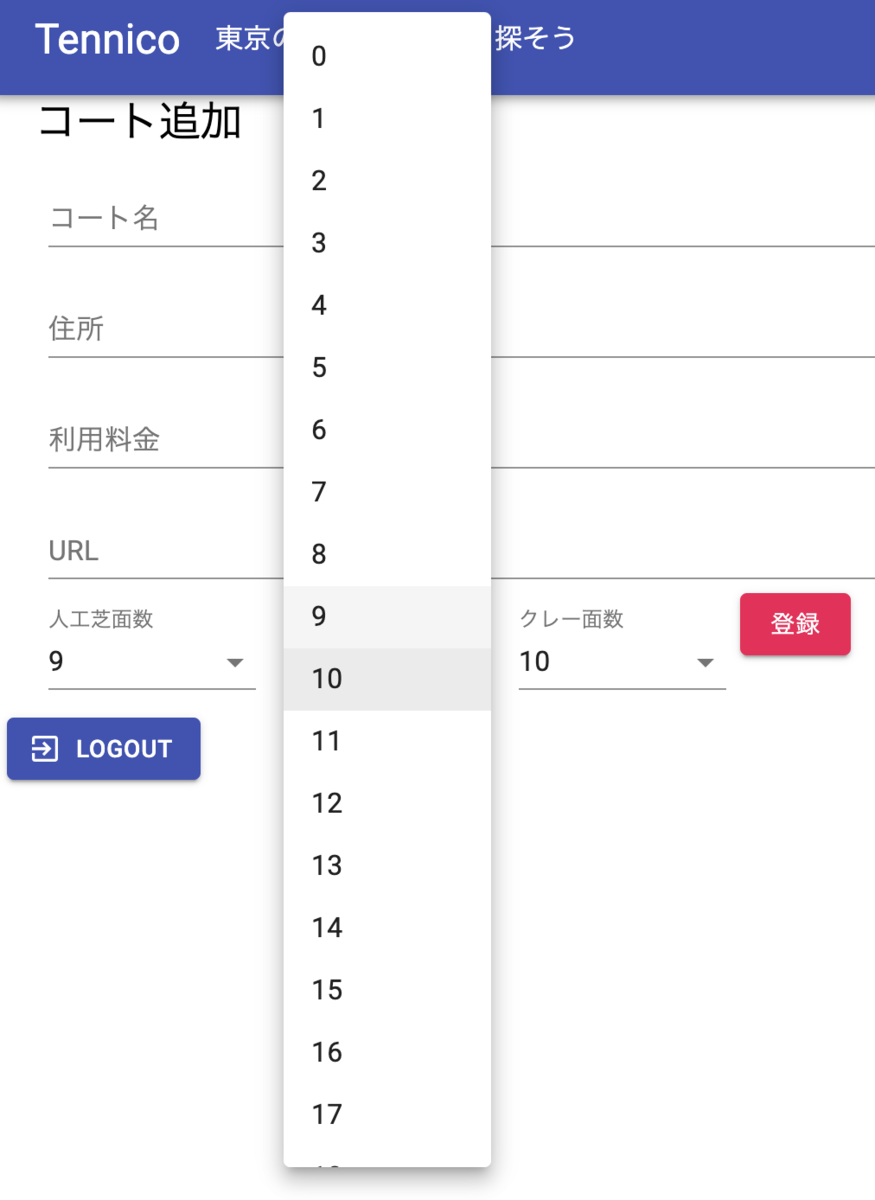
material-uiのSelect
Selectが切り替わらない。Controlledにするとだめ。 TextFieldは大丈夫なんだけどな...
TextFieldで書いてもいいらしい。見た目も綺麗なのでこっちで。
<TextField id="select" label="Age" value="20" select>
  <MenuItem value="10">Ten</MenuItem>
  <MenuItem value="20">Twenty</MenuItem>
</TextField>
そもそもFormControlとは?
Provides context such as filled/focused/error/required for form inputs. Relying on the context provides high flexibility and ensures that the state always stays consistent across the children of the FormControl. This context is used by the following components: - FormLabel - FormHelperText - Input - InputLabel
上のコンポーネントに入力状態を与えるもの、という感じだろうか。
TypeScriptでの連番配列の作り方
Array.from(Array(10).keys())
「オムニ」は「全天候」という意味らしい。
Selectはvalueにtouchedを入れないと反映されないな...。とりあえずこれで。
<TextField
    error={
      formik.touched.surfaceOmni &&
      formik.errors.surfaceOmni !== undefined
    }
    id="surface-omni"
    label="人工芝面数"
    value={formik.touched.surfaceOmni && formik.values.surfaceOmni}
    helperText={formik.touched.surfaceOmni && formik.errors.surfaceOmni}
    onChange={formik.handleChange}
    onBlur={formik.handleBlur}
    className={classes.select}
    select
    >
    {Array.from(Array(surfaceMax + 1).keys()).map((num) => (
      <MenuItem key={`surface-omni-${num}`} value={num}>
        {num}
      </MenuItem>
    ))}
</TextField>
とりあえず選べるようになった。
※ 2021/01/28 訂正 これだとタッチするまでControlled Componentじゃなくなってしまうので、修正
 <TextField
    error={
      formik.touched.surfaceOmni &&
      formik.errors.surfaceOmni !== undefined
    }
    id="surface-omni"
    label="人工芝面数"
    value={formik.values.surfaceOmni}
    helperText={formik.touched.surfaceOmni && formik.errors.surfaceOmni}
    onChange={formik.handleChange}
    onBlur={formik.handleBlur}
    className={classes.select}
    name="surfaceOmni"
    select
>
    {Array.from(Array(surfaceMax + 1).keys()).map((num) => (
      <MenuItem key={`surface-omni-${num}`} value={num}>
        {num}
      </MenuItem>
    ))}
</TextField>
2021年目標
子供が泣くので朝活できないから、今年の目標でも書いてみる。
とりあえずやりかかっている個人PJを完了させてしまうのと、最近知識の定着を意識してインプットしたいと思ってたので、本を読んで満足して終わらないよう、認証資格を目標に置いてみようかと思う。
こんな感じで↓
・Tennico Webのリリース
・Tennico iOSのリリース
・GCP Associated Cloud Engineer
・GCP Professional Cloud Architectの取得
参考
https://future-architect.github.io/articles/20190530/
https://qiita.com/mksamba/items/67ea80dec1dbb1d9692d
material-uiのtable修正&cssの改行
tableうまくいってないので修正。
TableCellの改行がされてなさそう。 TableContainerが不要そうだったので外しつつ、table自体にmin-width指定してたのを外す。
const useStyles = makeStyles({
-  table: {
-    minWidth: 650,
+  labelCell: {
+    wordBreak: 'keep-all',
+  },
+  valueCell: {
+    whiteSpace: 'normal',
+    wordBreak: 'break-word',
   },
 })
CSSの改行まわり整理
- whiteSpace - 改行やスペース・タブをそのまま表示するか、無視するかを指定。
- wordBreak - 改行するかを判断
- overflowWrap - 改行するかを判断
- wordWrap - overflowWrapと同じだが、サポートしてないブラウザがあるため併記するらしい?(https://w3g.jp/blog/confusing_word-break_word-wrap)
wordBreakとoverflowWrapの使い分け。
https://developer.mozilla.org/ja/docs/Web/CSS/overflow-wrap
メモ: word-break とは対照的に、 overflow-wrap は単語全体があふれずに行内に配置できない場合にのみ、改行を生成します。
なるほど。word-breakはあふれずに配置できても改行させるかを判断できるものということ。 今回だとあふれた場合だけ改行してほしいので、overflow-wrapを使うのが正しそう。 URLがwrapされないのでその場合はoverflow-wrap: anywhereにしてみる。
rel="nofollow" リンク先に評価を渡したくないときなどに使う。ユーザが投稿できるリンクには置いたほうがよさそう。 https://mightyace.co.jp/2020/07/15/column41/
sponsored, ugcというのができたらしい。
materialize-cssがNext.jsと相性悪そうなのでmaterial-uiに乗り換える
materializecssのSelectを入れたい。 https://materializecss.com/select.html
selectは初期化が必要らしいのだが、next.jsからだと呼べない。 https://materializecss.com/select.html#initialization
materialize-cssっていうnpmがあるので入れてみたけど、importで怒られる。
ReferenceError: window is not defined

This error happened while generating the page. Any console logs will be displayed in the terminal window.
browser-default使うと表示されるけどlabelがなぜか避けてくれない。
<div className="input-field col s12">
    <select id="surface-hard" className="browser-default">
      <option value="" disabled selected>
        Choose your option
      </option>
      <option value="1">Option 1</option>
      <option value="2">Option 2</option>
      <option value="3">Option 3</option>
    </select>
    <label htmlFor="surface-hard">Materialize Select</label>
</div>
materialize-css自体はあまりメンテされてないんだな。2年前...。 https://www.npmjs.com/package/materialize-css
react-materializeっていうのもある。これはメンテされてそう。 https://github.com/react-materialize/react-materialize
Material-UIというのがあって、こっちはNext.js対応してそう。ただしSSR用の設定がいろいろ必要っぽい。 https://material-ui.com/ https://github.com/mui-org/material-ui/tree/master/examples/nextjs https://tech.playground.style/javascript/next-material-ui/
移し変えるかぁ...面倒だが。
初期設定 https://material-ui.com/getting-started/installation/
Reactコンポーネントで指定できるの思ったより良い感じだな。
Running command: npm run build-functions
npm WARN lifecycle The node binary used for scripts is /var/folders/vl/dj884t816mj6ch0bvn80hlsc0000gn/T/yarn--1611412015683-0.5227895432393217/node but npm is using /Users/yosuke/.anyenv/envs/ndenv/versions/v10.16.0/bin/node itself. Use the `--scripts-prepend-node-path` option to include the path for the node binary npm was executed with.
これしてみた
npm config set scripts-prepend-node-path true
Duplicate identifier 'LibraryManagedAttributes'
node_modules/@types/react/index.d.ts:2982:14 - error TS2300: Duplicate identifier 'LibraryManagedAttributes'.

2982         type LibraryManagedAttributes<C, P> = C extends React.MemoExoticComponent<infer T> | React.LazyExoticComponent<infer T>
                  ~~~~~~~~~~~~~~~~~~~~~~~~

  node_modules/@types/react-transition-group/node_modules/@types/react/index.d.ts:2981:14
    2981         type LibraryManagedAttributes<C, P> = C extends React.MemoExoticComponent<infer T> | React.LazyExoticComponent<infer T>
                      ~~~~~~~~~~~~~~~~~~~~~~~~
    'LibraryManagedAttributes' was also declared here.
定義がダブっている模様。package.jsonに次を書き足して再度yarn。
"resolutions": {
    "@types/react": "^16.13.1"
},
デプロイ
(node:32695) UnhandledPromiseRejectionWarning: Unhandled promise rejection. This error originated either by throwing inside of an async function without a catch block, or by rejecting a promise which was not handled with .catch(). (rejection id: 17)
Warning: viewport meta tags should not be used in _document.js's <Head>. https://err.sh/next.js/no-document-viewport-meta
こういうのも出たのでviewportを移動。
まだ半端だけどとりあえず導入はできた。
Cloud Functionsのonly, exceptオプションについて調査したこと
Cloud Functionsの数が増えてくるとこんな感じのエラーが返ってきてデプロイに失敗する。
FirebaseError: HTTP Error: 429, Quota exceeded for quota group 'Write' and limit 'Write requests per 100 seconds' of service 'cloudfunctions.googleapis.com' for consumer 'project_number:XXXXXXXXXXXX'. To see usage, go to https://console.cloud.google.com/iam-admin/quotas?quota_group=Write&limit=CLIENT_PROJECT-100s&qs_error_code=INSUFFICIENT_TOKENS&project=my-project&service=cloudfunctions.googleapis.com. To request a quota increase, see https://cloud.google.com/functions/quotas.
100秒間に80回の書き込みの制限にひっかかっている。毎回onlyつける手もあるが、全Functionをデプロイする機会も結局発生すると思う。制限を上げる依頼をすることも可能そうだが、まずは制限を越えぬようにデプロイできないかを考えてみる。
※ 制限を上げる依頼はできなそう(https://cloud.google.com/functions/quotas#footnote)
1 書き込みの割り当てを引き上げることはできません。割り当て不足は通常、次のいずれかが原因で発生します。 高頻度で多数の関数を同時または順次にデプロイする CI / CD システムを使用している。 Firebase CLI を使用して複数の関数を同時にデプロイしている。
すぐ思いつくのはonlyのオプションを使ってちょっとずつ関数をデプロイしていく方法だが、Functionをindex.jsから削除した場合に、全Functionデプロイ時に削除されるかが気になったので調査。
onlyオプションでグループを指定した場合は削除される
グループを指定した場合は、同一グループ内で減ったFunctionがある場合は、デプロイ時にその関数が削除される。( --force を入れなければ確認される)
グループ化してないFunctionは削除できなそう
それではグループ化していないFunctionを消す場合はどうしたらいいかを考えた場合、 firebase deploy --only functions --except functions:<全グループ> みたいに書けばグループ化してないFunctionだけ残るのではないかと思ったのだが、--except ではFunctionsのグループを指定することはできない模様。基本的にはサービス名を指定して使うものに見える(--except firestore とか、 --except functions とか)。
というわけでグループ化してないFunctionは手動で消すしか無い。
結論
Functionを作る際は、何でもいいのでグループで囲った方がよさそう。
Firebase FirestoreのデータをBigQueryにエクスポートする
FirestoreのデータをBigQueryにデータを取り込む手段について。
まだサービスローンチ前ならFirebase Extension
直接試せてないがFirebase Extensionがあるのでこれを使いたい。
リアルタイムでデータが同期される(と思う)。 すでにローンチ済みのサービスの場合は、既存のデータを移す必要がある。
サービスローンチ済みならgcloud
gcloudコマンド(+ 一緒についてくるbqコマンド)でやる。
サービスアカウントの作成
ここを参考にロールを設定する。
コマンド例
実行毎にBigQueryが最新のFirestoreのデータに更新される。
# サービスアカウントのキーファイルをセット
gcloud auth activate-service-account --key-file key.json

# プロジェクトのセット
gcloud config set project my-firebase-project

# collection groupごとにFirestore→Storageへデータをエクスポート
gcloud firestore export gs://firestore-export-for-bq/2020-06-29T10:17:23.011+09:00 --collection-ids=user,shop,product

# collection groupごとにBigQueryのテーブルに入れる
bq load --source_format=DATASTORE_BACKUP --replace=true --projection_fields=name firestore.user gs://firestore-export-for-bq/2020-06-29T10:17:23.011+09:00/all_namespaces/kind_user/all_namespaces_kind_user.export_metadata
bq load --source_format=DATASTORE_BACKUP --replace=true --projection_fields=name,owners firestore.shop gs://firestore-export-for-bq/2020-06-29T10:17:23.011+09:00/all_namespaces/kind_shop/all_namespaces_kind_shop.export_metadata
bq load --source_format=DATASTORE_BACKUP --replace=true --projection_fields=name,price firestore.product gs://firestore-export-for-bq/2020-06-29T10:17:23.011+09:00/all_namespaces/kind_product/all_namespaces_kind_product.export_metadata
projection_fields オプションがあるおかげで、個人情報など取り込みたくない情報はフィルタ可能。
Docker Hubのgoogle公式イメージを使って定期実行する
gcloudを使うための公式イメージがDocker Hubで配布されているのでこれを使えばよい。
Cloud Runとか使っていけそうな気がする。